WPC_Wall_Panel_Installation_Guide
How to Install WPC Wall Panel Fluted Strips – Step-by-Step Guide
Foshan, China – [Insert Date] – WPC wall panels (Wood Plastic Composite) are becoming increasingly popular in modern interior design thanks to their 3D fluted style, waterproof performance, and easy installation. In this article, MILEGAO provides a complete step-by-step installation guide to help contractors, designers, and DIY enthusiasts achieve a perfect finish.
Why Choose WPC Wall Panel Fluted Strips?
WPC wall panels are an excellent alternative to paint or wallpaper. They are:
– Waterproof and Termite-Resistant – Ideal for humid areas like bathrooms, kitchens, or basements.
– Durable and Scratch-Resistant – Suitable for commercial and residential projects.
– Eco-Friendly – Low formaldehyde emissions and recyclable.
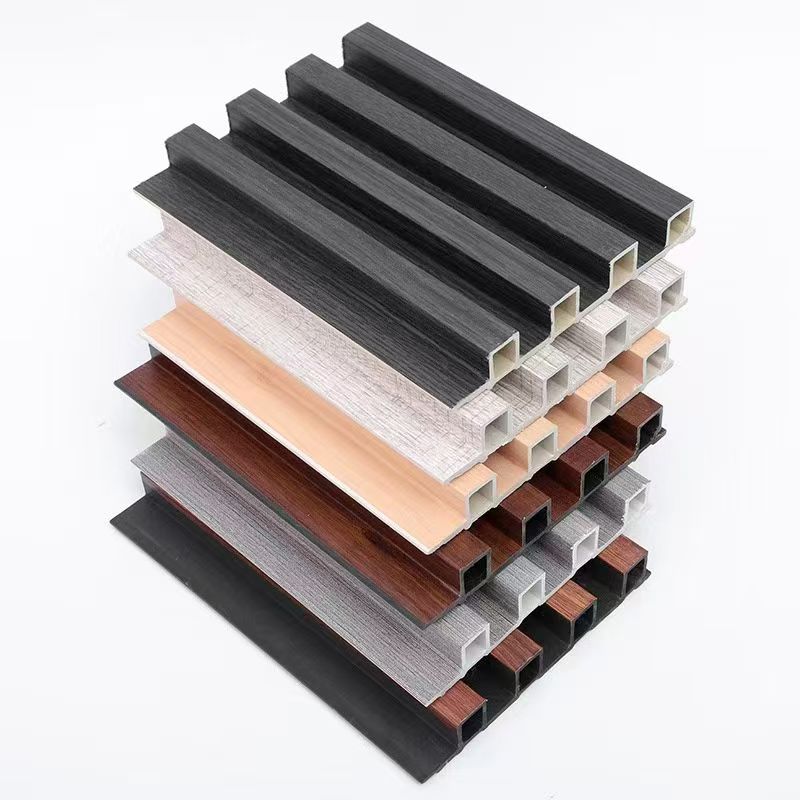
– Decorative and Stylish – The 3D fluted design creates a modern and elegant accent wall.
Tools and Materials Needed
Before starting, prepare the following:
– WPC fluted panels and matching end caps / corner trims
– Measuring tape and pencil
– Level (spirit level or laser level)
– Electric drill or nail gun
– Screws / clips for fixing panels
– Adhesive (for extra stability if needed)
– Saw or cutting tool for panel trimming
Step-by-Step Installation Instructions
Step 1: Prepare the Wall Surface
Ensure the wall is flat, clean, and dry. Remove dust, grease, or loose paint to ensure good adhesion and a straight installation.
[Insert Image for Step 1: Prepare the Wall Surface]
Step 2: Measure and Plan the Layout
Use a level to mark reference lines on the wall. Plan the panel layout carefully to minimize cutting waste and ensure symmetry.
[Insert Image for Step 2: Measure and Plan the Layout]
Step 3: Install Starter Clips or Base Trims
Fix starter clips or base trims at the bottom of the wall. This ensures the first panel is perfectly aligned and stable.
[Insert Image for Step 3: Install Starter Clips or Base Trims]
Step 4: Install the First Panel
Place the first fluted panel onto the starter clips, ensuring it is straight and level. Secure it with screws or clips through the hidden fastening system.
[Insert Image for Step 4: Install the First Panel]
Step 5: Continue Panel Installation
Slide the next panel into the groove of the previous one, creating a seamless joint. Repeat the process until the wall is fully covered.
[Insert Image for Step 5: Continue Panel Installation]
Step 6: Cut Panels to Fit (if needed)
Use a saw to trim the last panel to fit the remaining space. Always measure twice before cutting for a clean finish.
[Insert Image for Step 6: Cut Panels to Fit (if needed)]
Step 7: Install End Caps and Corner Trims
Finish the edges with matching trims for a professional look.
[Insert Image for Step 7: Install End Caps and Corner Trims]
Maintenance Tips
– Clean panels with a soft cloth and mild detergent – no need for repainting.
– Avoid using sharp objects that may scratch the surface.
– Inspect periodically to ensure fasteners are secure.
Conclusion
Installing WPC wall panel fluted strips is a fast and straightforward process that instantly upgrades any interior. Whether for living rooms, offices, hotels, or retail stores, MILEGAO’s WPC panels provide a luxurious, waterproof, and low-maintenance wall solution that lasts for years.
Suggested Images for This Article
1. Step-by-step installation photos (each step with clear visuals)
2. Before-and-after comparison of a wall with and without panels
3. Close-up of panel grooves and trims
4. Finished wall scene (living room or office background with WPC fluted panels)